23.01.18
아마존에서 작업이 미흡해서 일부 내용을 추가합니다.
이번에 서비스를 개발하고 오픈하면서...
예전에 LetsEncrypt를 적용해봤던 적은 있었다.
하지만 방법이 너무 오래되었고, 와일드카드 방식으로 도메인을 사용해서 인증 방법을 다시 찾아보았다.
그 전에 앞서 먼저 내가 사용했었던 두 가지 방식을 간단하게 정리하고 넘어가겠다.
Standalone 과 Webroot 방식
먼저 Standalone 방식의 경우 비 효율적인 방식이다.
적용 대상의 80포트에 서버를 띄워서 인증하고 인증서를 발급받는 방식인데,
실제 서비스 시 인증을 하게 될 경우 매우 곤란한 상황이 연출될 것이다.
그리고 와일드카드 서브 도메인의 인증이 불가능하다.
Webroot 방식의 경우 위 방법보다는 덜 무식하다.
서버의 특정 디렉토리에 접근 가능 여부를 테스트 해서 인증서를 발급해주는 방식이다.
하지만 서브도메인이 존재하는 경우 각각 인증서를 발급받아야 한다.
예를 들어서 설명하면 www.test.com 과 test.com 이렇게 두 가지 적용을 하려면 둘 다 인증서를 받아야 한다.
또한 api.test.com apis.test.com 등과 같이 와일드카드 서브 도메인들도 일일히 적용을 해야 하는 단점이 있다.
DNS 인증 방법
오늘 소개할 방법이다.
LetsEncrypt에서 요구하는 특정 값을 DNS의 TXT 레코드에 입력해서 인증을 하는 방식이다.
복잡할거 같은데 그냥 몇개 입력만 하면 끝난다.
그리고 이 방법은 와일드카드 서브 도메인 인증을 지원하기에 확장성은 좋은 인증 방법이다.
이번 적용 환경은 다음과 같다.
OS : Ubuntu 20.04
AWS EC2 환경 & Route53 기준 설명 (기타 DNS 서비스에서 유사 진행 가능)
먼저 설치를 진행해야 한다.
Ubuntu 진행 기준이다.
apt install letsencrypt
apt install certbot
설치 후 아래의 명령어를 통해 인증 절차를 진행한다.
certbot certonly --manual -d *.test.com -d test.com --preferred-challenges dns아래는 실행 결과이다.
민감한 정보는 일부 가렸다.
ubuntu$ sudo certbot certonly --manual -d *.test.com -d test.com --preferred-challenges dns
Saving debug log to /var/log/letsencrypt/letsencrypt.log

- - - - - - - - - - - - - - - - - - - - - - - - - - - - - - - - - - - - - - - -
You have an existing certificate that contains a portion of the domains you
requested (ref: /etc/letsencrypt/renewal/test.com.conf)

It contains these names: test.com

You requested these names for the new certificate: *.test.com, test.com.

Do you want to expand and replace this existing certificate with the new
certificate?
- - - - - - - - - - - - - - - - - - - - - - - - - - - - - - - - - - - - - - - -
(E)xpand/(C)ancel: e
Renewing an existing certificate for *.test.com and test.com

- - - - - - - - - - - - - - - - - - - - - - - - - - - - - - - - - - - - - - - -
Please deploy a DNS TXT record under the name:

_acme-challenge.test.com.

with the following value:

You_Input_This_message

Before continuing, verify the TXT record has been deployed. Depending on the DNS
provider, this may take some time, from a few seconds to multiple minutes. You can
check if it has finished deploying with aid of online tools, such as the Google
Admin Toolbox: https://toolbox.googleapps.com/apps/dig/#TXT/_acme-challenge.test.com.
Look for one or more bolded line(s) below the line ';ANSWER'. It should show the
value(s) you've just added.

- - - - - - - - - - - - - - - - - - - - - - - - - - - - - - - - - - - - - - - -
Press Enter to Continue
여기까지 작업 후 AWS의 Route53에 접근 후 호스팅 영역의 호스팅을 선택한다.
아래의 순서대로 작업을 진행하다.
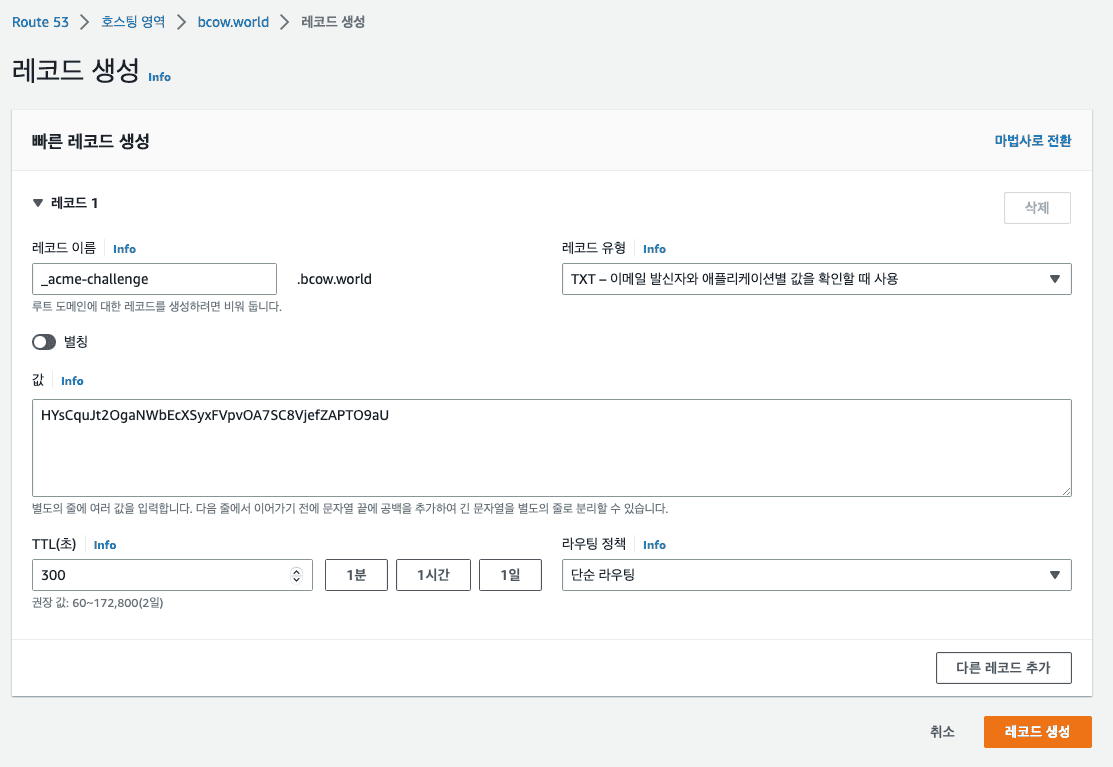
- 레코드 생성을 한다.
- 레코드 이름에는 _acme-challenge.test.com. 에서 앞에 _acme-challenge 을 입력한다.
- 레코드 유형에는 TXT를 선택한다.
- 값에는 **with the following value:**에 있는 You_Input_This_message 값을 입력한다.
이렇게 설정을 다 한 후에 아래 도메인 확인인가 제대로 되었는지 확인하는 버튼이 있다.
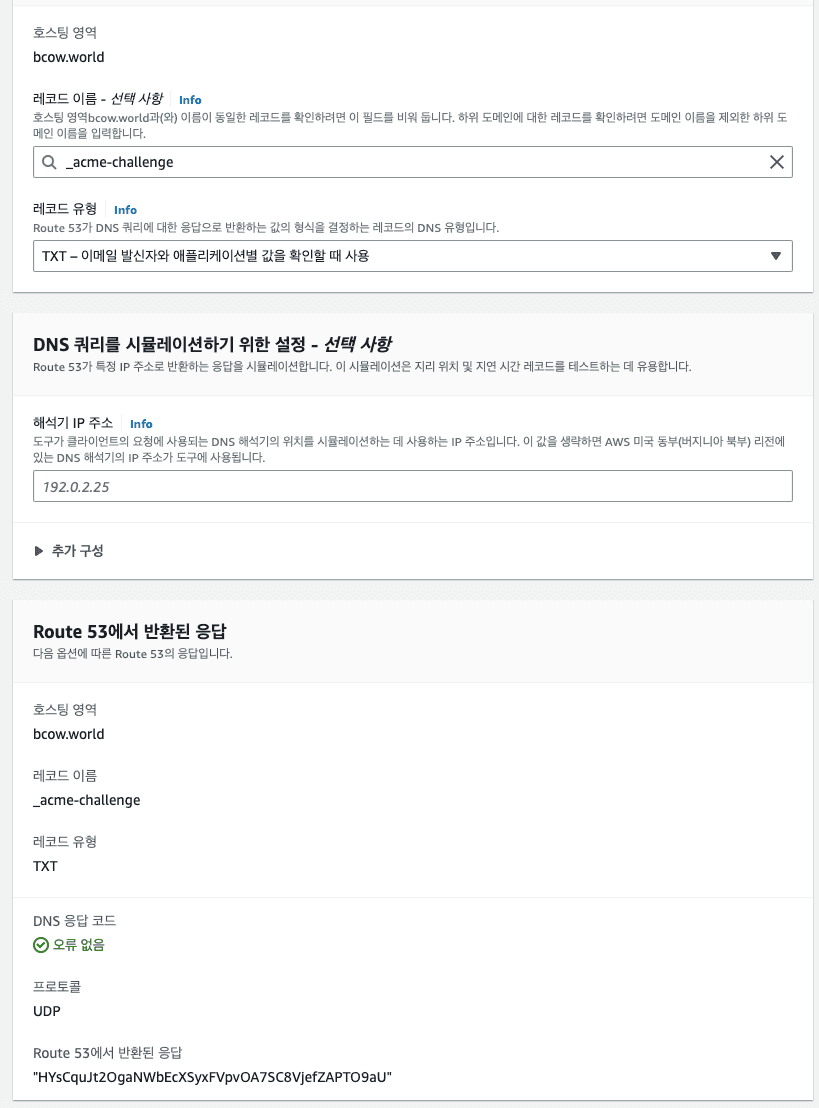
그걸 누르고 반환된 응답이 정상이 뜰 경우
저 설치 콘솔로 와서 엔터를 누르면 아래와 같이 진행된다.
Successfully received certificate.
Certificate is saved at: /etc/letsencrypt/live/test.com/fullchain.pem
Key is saved at:         /etc/letsencrypt/live/test.com/privkey.pem
This certificate expires on 2022-12-15.
These files will be updated when the certificate renews.

NEXT STEPS:
- This certificate will not be renewed automatically. Autorenewal of --manual certificates requires the use of an authentication hook script (--manual-auth-hook) but one was not provided. To renew this certificate, repeat this same certbot command before the certificate's expiry date.

- - - - - - - - - - - - - - - - - - - - - - - - - - - - - - - - - - - - - - - -
If you like Certbot, please consider supporting our work by:
 * Donating to ISRG / Let's Encrypt:   https://letsencrypt.org/donate
 * Donating to EFF:                    https://eff.org/donate-le
- - - - - - - - - - - - - - - - - - - - - - - - - - - - - - - - - - - - - - - -
ubuntu$
여기까지 하면 인증서 발급은 끝이며, 나와 같이 AWS EC2 환경에서 적용하는 사람이라면 다음과 같은 작업을 추가해줘야 한다.
AWS 작업
먼저 콘솔에서는 다음과 같은 절차로 진행한다.
참고로 pem파일들은 아래의 경로에서 확인이 가능하다.
1> $ sudo ls /etc/letsencrypt/live/
2> $ sudo cat /etc/letsencrypt/live/your.domain/fullchain.pem
위 명령어 중 1번을 수행하면 등록한 도메인이 디렉토리 형태로 뜨는데,
내용을 확인하려면 2번 명령어를 수행한다.
해당 디렉토리의 조작 및 조회에 root 권한이 필요하여 sudo를 붙인다.
이렇게 준비 후 아래 순서대로 작업해준다.
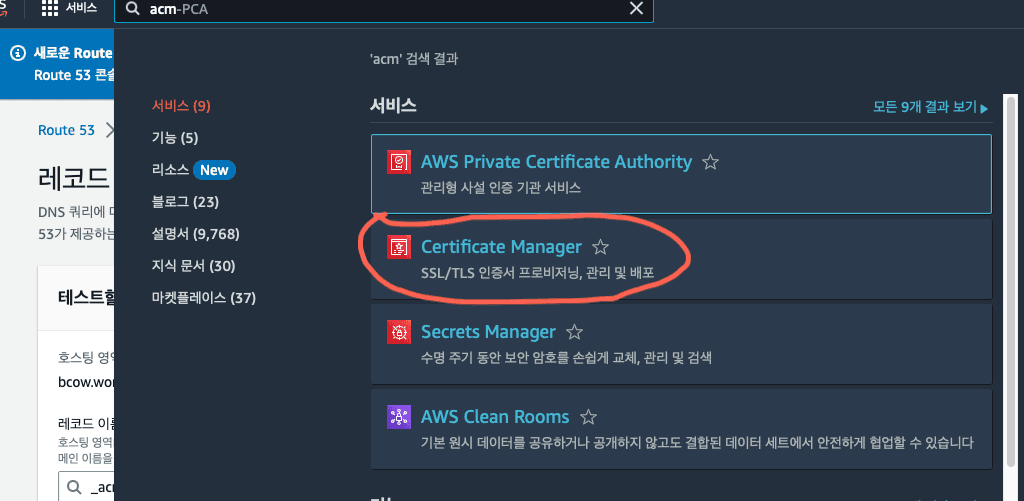
- AWS 콘솔에서 Certificate Manager 이동
- 외부에서 획득한 인증서 가져오기
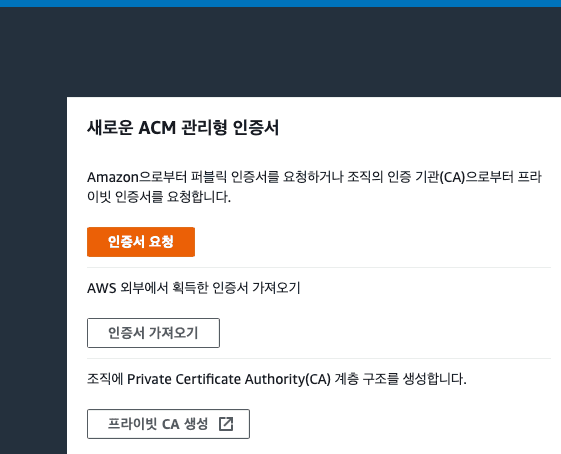
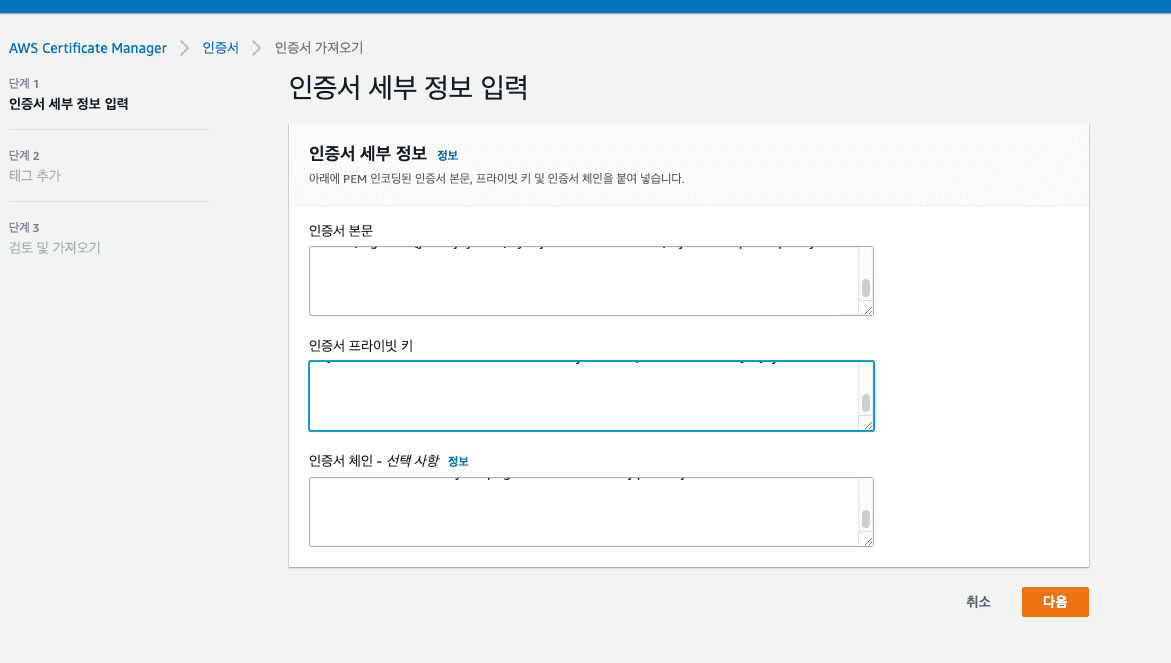
- 인증서 선택에서 각 항목에 해당 하는 값을 가져온다. (아까 생성한 pem 파일을 사용)
- 인증서 본문 => cert.pem
- 인증서 프라이빗 => privkey.pem
- 인증서 체인 => fullchain.pem
- 마무리 하면 ec2에 접속해서 콘솔에서 아래와 같이 nginx를 재시작 해준다.
sudo service nginx restart
정리
nginx에도 몇 가지 작업을 해줘야 하는데 이 부분은 따로 포스팅해서 올릴 예정이다.